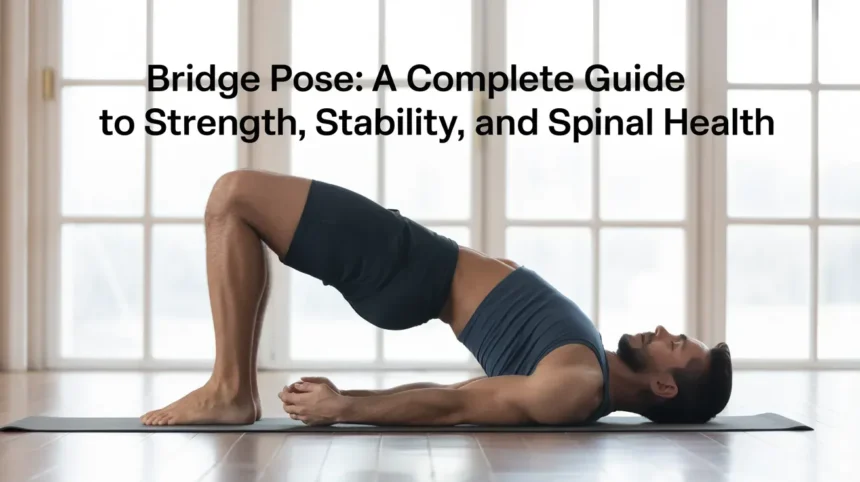
Bridge Pose, traditionally called Setu Bandha Sarvangasana, is one of those yoga postures that appears simple at first glance but delivers surprisingly deep results. It strengthens the back body, opens the chest, supports spinal health, and creates a powerful connection between breath and movement.
- Understanding Bridge Pose Beyond the Shape
- Coordinated Spinal Articulation
- Balanced Glute Engagement
- Core Stability
- Chest Expansion
- Even Weight Distribution
- The Meaning of Setu Bandha Sarvangasana
- Why Bridge Pose Is So Important in Modern Life
- The Hips Extend
- The Chest Opens
- The Spine Gently Arches
- The Back Body Activates
- Step 1: Set Up a Strong Foundation
- Step 2: Prepare and Align the Spine
- Step 3: Activate Before You Elevate
- Step 4: Lift with Controlled Articulation
- Step 5: Refine and Stabilize at the Top
- Step 6: Breathe with Awareness
- Step 7: Release Slowly and Intentionally
- 1. Strengthens the Posterior Chain
- 2. Opens the Chest and Shoulders
- 3. Improves Hip Extension and Pelvic Balance
- 4. Supports Lower Back Stability
- 5. Stimulates Circulation and Energy Flow
- Mental and Emotional Benefits
- How Long Should You Hold Bridge Pose?
Unlike intense backbends that require advanced flexibility, Bridge Pose is accessible, adaptable, and therapeutic. It can be practiced as a strengthening posture, a restorative hold, or even as part of rehabilitation when done correctly.
This detailed guide explores everything you need to know about Bridge Pose — from anatomy and alignment to benefits, variations, sequencing ideas, and common mistakes.
Understanding Bridge Pose Beyond the Shape
At its foundation, Bridge Pose is a supine backbend, meaning it is performed lying on the back. The knees are bent, the feet press into the ground, and the hips rise toward the ceiling.
But the real effectiveness of the pose is not about how high you lift your hips — it’s about how intelligently you organize the body while lifting.
A well-executed Bridge Pose involves:
Coordinated Spinal Articulation
Rather than pushing the hips up in one abrupt motion, the spine should roll upward gradually. The tailbone lifts first, followed by the lower back, mid-back, and finally the chest. This wave-like articulation promotes spinal mobility and control.
Balanced Glute Engagement
The glutes provide the primary lifting force. However, over-squeezing can compress the lower back. The goal is controlled activation — strong yet not rigid.
Core Stability
The deep abdominal muscles stabilize the lumbar spine. Without core engagement, the lower back may overarch and create discomfort.
Chest Expansion
As the sternum moves toward the chin, the chest broadens. This encourages thoracic extension — an area that often becomes stiff from prolonged sitting.
Even Weight Distribution
Weight should be balanced between the feet and the shoulders. The neck remains neutral and free of pressure.
Rather than chasing maximum height, Bridge Pose emphasizes length and integration. The spine lengthens as it extends. The breath remains smooth and steady. The body feels supported rather than strained.
When performed this way, Bridge Pose becomes a lesson in structural harmony — not just a physical lift, but a coordinated, whole-body expression.
The Meaning of Setu Bandha Sarvangasana
The Sanskrit name offers symbolic insight into the pose’s deeper significance:
- Setu – bridge
- Bandha – bind or lock
- Sarva – all
- Anga – limbs
- Asana – posture
Translated fully, Setu Bandha Sarvangasana suggests a posture that “locks” or integrates all parts of the body into a unified bridge.
Symbolically, Bridge Pose represents connection:
- Between upper and lower body
- Between strength and flexibility
- Between effort and ease
- Between breath and structure
A bridge links two separate points. In the same way, this posture connects opposing forces within the body — grounding through the feet while lifting through the hips, stability in the legs while openness in the chest.
Energetically, the pose is often associated with opening the heart space while remaining grounded. The feet press firmly into the earth, creating stability, while the chest expands upward, encouraging receptivity.
This dual quality — grounded yet open — is part of what makes Bridge Pose so balanced and accessible.
Why Bridge Pose Is So Important in Modern Life
Modern lifestyles place repetitive strain on the body. Many people spend hours each day sitting — at desks, in cars, or on couches. Over time, this creates predictable imbalances:
- Hip flexors shorten
- Glutes weaken
- Shoulders round forward
- Thoracic spine stiffens
- Lower back compensates
Bridge Pose directly addresses these issues.
When you lift into Bridge:
The Hips Extend
Sitting keeps the hips in constant flexion. Bridge reverses this by extending the hips, stretching tight hip flexors and activating underused glute muscles.
The Chest Opens
Rounded shoulders from screen time collapse the chest. Bridge broadens the collarbones and lifts the sternum, improving posture.
The Spine Gently Arches
Instead of compressing the lower back, a properly executed Bridge distributes extension evenly through the spine, encouraging balanced mobility.
The Back Body Activates
Weak posterior muscles are re-engaged, helping restore structural balance.
In essence, Bridge Pose acts as an antidote to sedentary posture. It strengthens what modern life weakens and opens what daily habits tighten.
Beyond posture correction, the pose also supports:
- Improved breathing mechanics
- Better pelvic alignment
- Enhanced circulation
- Reduced mild lower back discomfort
- Increased body awareness
For these reasons, Bridge Pose is not just a yoga exercise — it is a corrective tool for modern movement patterns.
Detailed Step-by-Step Guide to Bridge Pose
Practicing Setu Bandha Sarvangasana with proper technique transforms it from a simple hip lift into a powerful, full-body integration exercise. The key is not rushing into height, but building the pose layer by layer — grounding first, then activating, then lifting with awareness. Below is a deeply detailed breakdown to help you refine every stage of the posture.
Step 1: Set Up a Strong Foundation
Every stable structure begins with its base, and in Bridge Pose, your foundation is your feet and shoulders.
Start by lying flat on your back on a comfortable but firm surface. Allow your spine to settle naturally before adjusting your legs. Bend your knees and place your feet flat on the floor, approximately hip-width apart. The inner edges of your feet should run parallel to each other. Avoid turning your toes outward, as this can strain the knees and reduce glute engagement.
Walk your heels toward your hips until your fingertips can lightly graze the backs of your heels. This alignment ensures your knees will stack properly over your ankles when you lift.
Let your arms rest comfortably alongside your body with palms pressing gently into the floor. Spread your fingers naturally and allow your shoulders to relax down and away from your ears. Feel the back of your head, shoulders, arms, and feet grounding into the mat. This grounding creates stability before any movement begins.
Take a moment here. Notice the natural curve of your spine. Allow your breath to deepen.
Step 2: Prepare and Align the Spine
Before lifting, organize your upper body.
Gently draw your chin slightly toward your chest without flattening the neck completely. This subtle adjustment lengthens the back of the cervical spine and protects the neck once the hips rise.
Keep your gaze directed straight upward. Once you lift into the pose, resist the temptation to turn your head. Turning the head while the neck is bearing weight can create unnecessary strain.
Broaden across your collarbones and soften the front of your shoulders. Imagine your shoulder blades sliding slightly toward each other and down your back. This action prepares your chest to open safely in the lift.
At this stage, your body should feel stable, symmetrical, and grounded.
Step 3: Activate Before You Elevate
Bridge Pose becomes powerful when muscles engage before the lift.
Take a slow, steady inhale through your nose.
As you exhale:
- Press evenly through all four corners of each foot — base of big toe, base of little toe, inner heel, outer heel.
- Gently draw your lower belly inward to activate your deep core stabilizers.
- Lightly engage your glutes, thinking of firmness rather than force. Avoid aggressive squeezing, which can compress the lower back.
This pre-activation stabilizes the pelvis and ensures the lift is controlled rather than abrupt.
You should feel your body preparing — not straining — for movement.
Step 4: Lift with Controlled Articulation
On your next inhale, begin to lift your hips slowly.
Rather than thrusting upward in one motion, imagine peeling your spine off the mat one vertebra at a time:
- The tailbone gently curls upward.
- The lower back begins to lift.
- The mid-back rises.
- The chest broadens and moves slightly toward the chin.
Think of creating length through the front of your body rather than collapsing into the lower back.
Keep your knees stacked directly above your ankles. They should remain hip-width apart and track forward rather than splaying outward or collapsing inward.
Press firmly into your feet while allowing your shoulders and upper arms to support part of the weight. Your neck should feel free of pressure.
Step 5: Refine and Stabilize at the Top
Once lifted, pause and refine your alignment.
At the peak of the pose:
- Thighs remain parallel and active.
- Knees stay aligned over ankles.
- Hips lift evenly without twisting.
- Ribs remain contained rather than flaring outward.
- The neck stays long and neutral.
If comfortable, you may interlace your fingers beneath your body. Gently roll one shoulder at a time underneath you to broaden the chest further. Press your clasped hands into the floor to lift the sternum slightly higher without forcing the lower back to arch excessively.
The lift should feel supported by strength, not by compression.
Step 6: Breathe with Awareness
Hold the posture for 5–10 steady breaths.
Each inhale should expand your rib cage and gently elevate your chest. Each exhale should maintain light core engagement and steady grounding through your feet.
Focus on:
- Balanced weight between feet and shoulders
- Even distribution across both hips
- Smooth, uninterrupted breathing
- Stability without rigidity
If you feel tension building in the neck or lower back, slightly reduce the height of your lift while maintaining engagement.
This phase is where strength and breath meet. The longer you hold with control, the more endurance and awareness you develop.
Step 7: Release Slowly and Intentionally
To come out of the pose, avoid dropping your hips abruptly.
First, unclasp your hands if they are interlaced and place your arms back alongside your body.
On an exhale, begin lowering your spine down in reverse order:
- Upper back softens to the mat
- Mid-back lowers
- Lower back descends
- Tailbone returns to the floor
Move slowly, maintaining control throughout the descent. This controlled release strengthens the spine just as much as the lift.
Once your hips settle, allow your knees to gently touch or remain hip-width apart. Rest your hands on your abdomen and take a few natural breaths.
Notice the sensations in your spine, hips, and chest. There may be warmth, openness, or subtle pulsation — all signs of active circulation and muscular engagement.
The Physical Benefits of Bridge Pose
Practicing Setu Bandha Sarvangasana regularly delivers far more than a simple stretch. When performed with proper alignment and muscular engagement, it becomes a powerful full-body conditioning posture that strengthens, mobilizes, and restores balance throughout the musculoskeletal system.
1. Strengthens the Posterior Chain
The posterior chain refers to the network of muscles running along the back of your body — and Bridge Pose directly targets this essential support system.
During the lift, the following muscles activate strongly:
- Gluteus maximus – the primary hip extensor responsible for lifting the pelvis
- Hamstrings – assist in hip extension and stabilize the knees
- Spinal erectors – support the spine in controlled extension
- Deep core stabilizers – including the transverse abdominis, which protects the lower back
In modern life, these muscles often weaken due to prolonged sitting. Weak glutes and spinal stabilizers contribute to poor posture and increased strain on the lumbar spine. Bridge Pose reactivates these underused muscles, helping restore structural support and reducing the risk of lower back discomfort.
When practiced consistently, this strengthening effect improves posture, athletic performance, and everyday movement efficiency.
2. Opens the Chest and Shoulders
As the hips rise and the sternum moves toward the chin, the front body lengthens.
This action stretches:
- Pectoral muscles (chest)
- Front deltoids (shoulders)
- Upper chest and collarbone region
For people who spend hours working on computers or looking down at devices, the chest often collapses forward. Bridge Pose counteracts this rounding pattern by encouraging thoracic extension — the ability of the upper spine to extend backward.
Opening the chest improves:
- Breathing capacity
- Oxygen intake
- Shoulder mobility
- Overall posture
With regular practice, you may notice standing taller and breathing more deeply without conscious effort.
3. Improves Hip Extension and Pelvic Balance
One of the most significant modern postural imbalances is shortened hip flexors caused by prolonged sitting. Tight hip flexors can tilt the pelvis forward and increase pressure on the lower back.
Bridge Pose restores natural hip extension by:
- Lengthening hip flexors
- Strengthening glutes
- Stabilizing the pelvis
Balanced hip function improves walking mechanics, running performance, and spinal alignment. Over time, this can significantly reduce chronic tightness in the front of the hips.
4. Supports Lower Back Stability
When executed correctly, Bridge Pose distributes spinal extension evenly instead of compressing the lumbar region.
By strengthening the muscles that support the spine, the posture helps:
- Improve lumbar stability
- Reduce compensatory strain
- Enhance core-spine coordination
It is particularly beneficial for individuals experiencing mild, posture-related lower back discomfort. However, the key is mindful engagement — lifting with control rather than forcing height.
5. Stimulates Circulation and Energy Flow
Elevating the hips above heart level creates a mild inversion effect. This encourages improved blood flow through:
- The pelvic region
- The abdominal organs
- The spinal column
Enhanced circulation delivers nutrients to tissues and helps reduce muscular fatigue. Many practitioners report feeling energized after holding Bridge Pose, even though the posture itself is relatively simple.
Mental and Emotional Benefits
Bridge Pose does more than strengthen muscles — it influences the nervous system.
Because the chest expands and the breath deepens, the pose can shift breathing from shallow, stress-based patterns to slower diaphragmatic breathing. This has a direct calming effect on the body.
Practitioners often experience:
- Reduced stress levels
- A boost in energy
- Emotional lightness
- Increased mental clarity
When practiced in a supported variation, Bridge Pose can activate the parasympathetic nervous system — the body’s relaxation response. This makes it especially useful after long workdays or during restorative yoga sessions.
The combination of grounding through the feet and opening through the heart creates a feeling of both stability and openness — a rare but powerful emotional balance.
Common Mistakes and How to Fix Them
Although Setu Bandha Sarvangasana is a beginner-friendly posture, small alignment mistakes can limit its benefits. A common issue is letting the knees fall outward, which reduces pelvic stability. Keeping the thighs parallel — or gently squeezing a block between them — helps maintain proper alignment.
Another mistake is over-squeezing the glutes. While they should be active, excessive clenching can compress the lower back. Instead, lift the hips with controlled engagement and light core support.
Some practitioners shift too much weight into the neck, which can cause strain. The weight should stay grounded through the shoulders and feet, and the head should remain still.
Placing the feet too far from the hips can also reduce lifting power and strain the hamstrings. Keep knees stacked over ankles for optimal support.
Finally, avoid hinging only into the lower back. Focus on lifting the chest toward the chin so the curve is evenly distributed through the entire spine.
How to Include Bridge Pose in Your Routine
Bridge Pose is versatile and fits seamlessly into many sequences.
It works especially well:
- After core activation exercises
- Before deeper backbends
- During cool-down phases
- As part of rehabilitation programs
It pairs beautifully with:
- Cat-Cow movements
- Supine spinal twists
- Gentle forward folds
Used consistently, it enhances both strength and recovery.
How Long Should You Hold Bridge Pose?
When practicing Setu Bandha Sarvangasana, the ideal hold time depends on your experience level and intention.
Beginners can start with about five slow, steady breaths, focusing on alignment and smooth breathing rather than height. Intermediate practitioners may hold the pose for 20 to 30 seconds, building strength and stability. More advanced practitioners can remain in the posture for 45 to 60 seconds, maintaining even engagement throughout the body.
If practicing the supported or restorative variation, you may stay in the pose for up to five minutes, allowing the body to relax fully while using a block or bolster for support.
No matter the duration, the quality of your breath and the integrity of your alignment are always more important than how long you hold the pose.
Final Thoughts
Bridge Pose may not appear dramatic, but its effects are profound. It strengthens the areas weakened by sedentary lifestyles, opens the body where posture collapses, and teaches mindful coordination between effort and ease.
Practiced consistently, Setu Bandha Sarvangasana becomes more than an exercise — it becomes a daily structural reset for your spine, posture, and nervous system.
If you’d like, I can next create a complete SEO-optimized long-form blog version (2,500+ words) combining all expanded sections into one polished article.